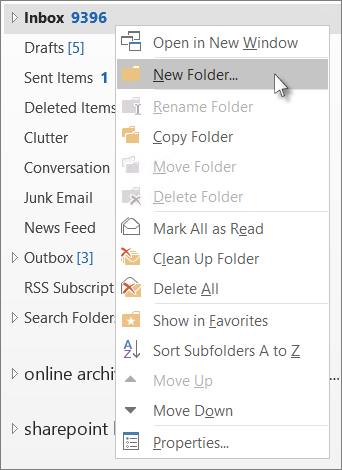
Organizing your emails into folders in Outlook 2016.
When the number of unread and unattended emails in your inbox turns your inbox into a mess, then you know it’s time for an intervention.
Outlook 2016 has some practical tools that will help you organise your inbox and cope with the influx of regular, urgent, business and personal mail pinging into your inbox every few minutes.
Studies suggest that the average working adult spends at least two hours daily checking and responding to their emails. Sometimes it feels as if we spend more time going through and sorting emails than doing actual work.
The good news is that with Outlook 2016 you can organize your mail into folders, and split the messages into manageable groups using the View feature. Archiving your old messages (or deleting them) is also a great way to significantly reduce your inbox content.
New Email Folder
You can create as many folders as you need to organise your mail into. Once you create the folders, they will remain there forever, unless you later decide to delete them.
You can choose how to categorise the folders’ contents, depending on how you use your email address – different folders for specific clients, Personal for non-business related mail, and even project-based folders.

How to Create a Folder for New Messages:
You can create a folder for new messages by following these steps:
1. Click on the Mail button in the Navigation panel and select the Inbox folder.
2. Select the Folder tab in the ribbon and click New Folder, opening the Create New Folder window.
3. Type a name for the new folder in the Name text box.
4. Click OK to create the folder, which will now appear in the list of folders.
5. Repeat steps 1-4 to create other folders.
To move messages to the various new folders, follow these steps:
1. Click on the inbox folder.
2. Highlight the messages you want to move by clicking on the message titles.
3. Select the Home tab on the ribbon and click Move.
4. From the drop-down list, select the desired folder. The selected messages will automatically move to that folder.
If you’ve created many folders and they don’t all show in the Move list, you can move messages to a folder not on the list by going to Folder on the ribbon and clicking Other Folder. This will display all folders, allowing you to drag and drop your emails to the desired folder.
Thank you for your message. It has been sent.
DoneOooops
Something went wrong, please try again
